Saturday, November 12, 2011

Winmalee

Summary:
Winmalee was the first track in the Blue Mountains I was able to complete as a beginner mountain biker, and I loved it. The track is a loop so you don't have to ride any of it twice, and the vegetation you ride through is quite varied.


At a little over 9km the loop is not too long for those still working on their fitness and building up to longer rides. There were a couple of hills I had to push the bike up - but these are not significant. If you want a slightly longer but overall easier ride I would recommend Falconbridge Point as a first ride.

Getting there:
I recorded my ride using the great android app My Tracks, and the result is displayed below. Heading from Sydney, follow the M4/Great Western Highway west to Springwood, and then turn off onto Hawkesbury Road towards Winmalee. Follow this about 5km then turn off left into White Cross Road, which you follow to the end where the trail head and a small gravel car park are located.

Review:
When you arrive at the trailhead - there is a helpful information board just inside the gate. This is a very easy track to follow, if it is your first time here you will not have to worry about getting lost.

The trail stars with some downhill, and after about 100m you are able to continue straight/right along Shaw's Ridge, or turn left to Blue Gum Swamp. As this is a loop track, you can go either way. I would recommend heading towards Shaw's ridge - this is the most common direction, probably due to the quite steep downhill as you descend from Shaw's Ridge down to the Blue Gum Swamp Creek return leg.

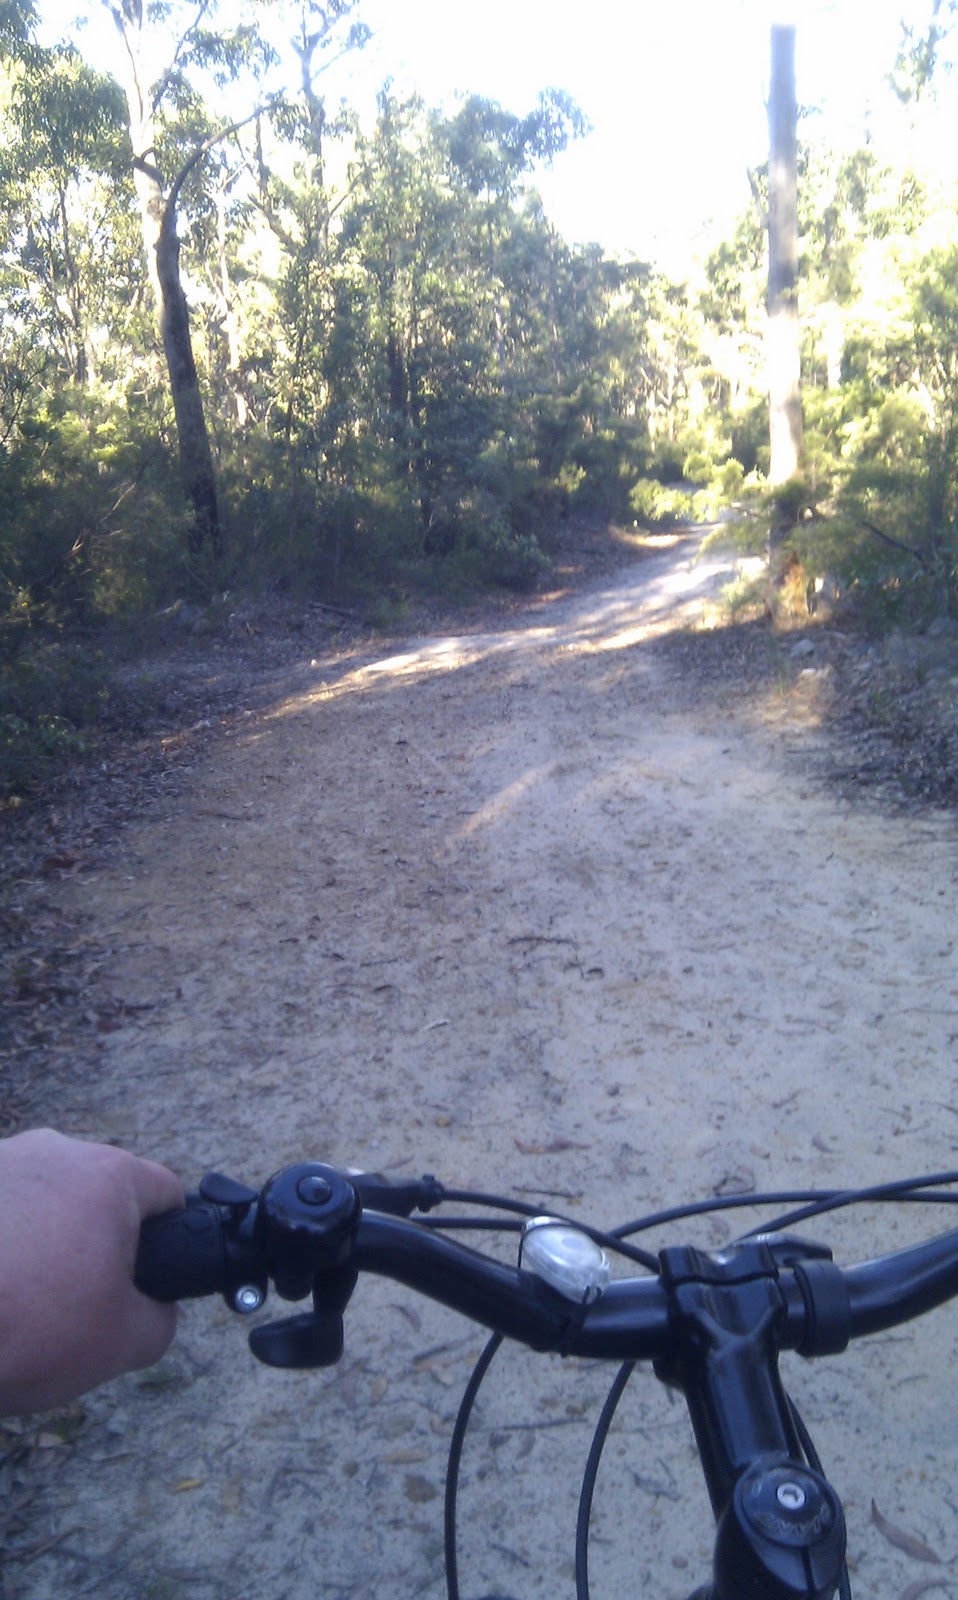
Shaw's Ridge is mostly rolling hills - and is a pretty wide, well maintained fire trail. There is one short steep rocky incline that I have still not been able to ride through after 4 attempts now - but apart from that this is easy riding. After about 4km you will come to a pretty steep decline with a few very sharp turns, so take it easy down this section. You will see why most people prefer to ride the track in this direction as you are descending this hill.

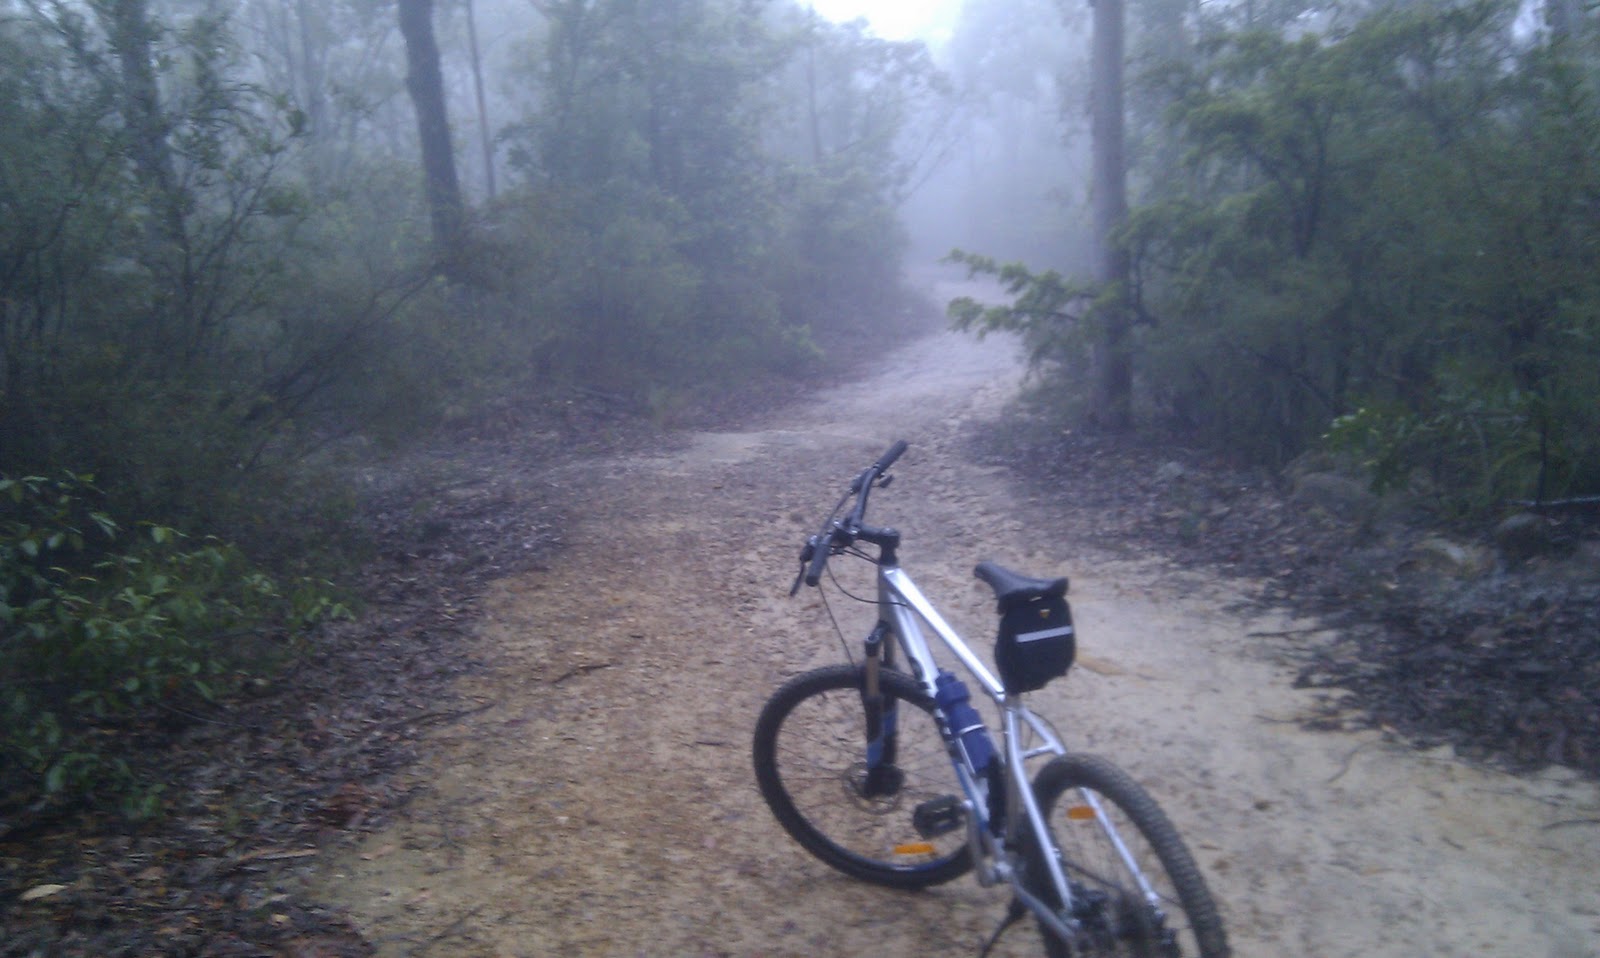
Once you reach the bottom you will follow the track across to Blue Gum Swamp Creek - and commence the return leg of the loop. This is my favourite part of the ride, the vegetation changes and even though it is still fire trail, the track is overgrown with ferns enough that it feels like single track. There are a couple of rocky creek crossing so take it easy, and have some fun riding through the water if it has rained recently. remember that there may be riders flying along here doing the loop in the other direction and walkers use this track as well.

There is an optional extension to the track at the start of Blue Gum Swamp Creek - you will see a sign pointing back to Shaw's Ridge (where you just came from), continuing along to Blue Gum Swamp, or you can take the alternate trail marked 'Bees Nest Hill' and 'Grose Head South'. I have not ridden the Bees Nest Hill leg, but understand it is very steep and involves pushing the bike up a 1km hill for most riders. Once you reach the hill it is only a short ride to a great lookout, and you can trek to Grose Head south (about an hour return) if you are particularly keen.

After the nice easy ride along Blue Gum Swamp Creek, you have a bit of climb back up to the intersection where you first went straight along Shaw's ridge. If you are not fit this may be a bit of a challenge, I still have to stop and take a breather and push the bike up one or two small sections here, but it is nice wide fire trail and not a long pull.

Overall I find this to be a great track and manageable for those just starting out. In hindsight I think Falconbridge Point would have been a slightly easier track for my first ride, even though it is a little longer. The variation of the track and vegetation make Winmalee a really enjoyable ride overall, and as it only takes about 40 minutes I will definitely be fitting this loop in as an early morning ride on the way to work in the future.


Map:

This map shows the basic loop from the trailhead, along Shaw's Ridge and returning via Blue Gum Swamp.

View 2011-10-31 16:24 in a larger map

Video:

A short snippet of video along the return Blue Gum Swamp leg of the loop. Apologies it is a little shaky, I was using the high tech method of holding my phone in my hand to record it.


Friday, November 11, 2011

Sydney Olympic Park

After my lame efforts at Lawson'd Ridge - I decided that I needed a nice flat easy location to crank out some km on the bike. I enjoyed my ride along the nice flat gravel road a couple of weeks ago simply because I could cover more distance than other locations. Granted - it was not the rugged mountain trails I really want to be riding, but all things in their time.

I need somewhere I can cycle constantly for a good hour without tiring. I hope this will help me build fitness, endurance in my legs and more than anything - self confidence that I can tackle a ride of more than a few km.

So with a little more research I  decided that I would aim to complete Winmalee as my first 'recognised MTB trail' - but before that I would throw the bike in my car on work days and take advantage of all the nice flat cycleways around Sydney Olympic Park (which happens to be where I work).

This was a great move. I have ridden every few days at Olympic Park over the last couple of weeks, covering almost 20km some days. While this may not sound like much - it is a big step up for me, and the confidence boost I needed. I can definitely feel my fitness and muscle endurance improving.

There is dedicated cycleway all through Olympic Park, and you can ride through the wetlands, or along Paramatta river (below), or even around Bicentenial Park. This would be a great place to take your family for a ride - I highly recommend it for befinners or just a relaxing day out.


I even dropped by Winmalee one afternoon and rode about 3km out along Shaws Ridge and back. I didn't want to ride the full loop for the first time in the fading afternoon light, but I had great fun and now feel I am ready to tackle the Winmalee trail in the next few days.

I think it is a good idea to ride new trails for the first time in the morning rather than the afternoon - just in case it takes longer than expected or I get lost. Although from what I read the Winmalee loop is very easy to follow.

View 2011-10-25 12:04 in a larger map

Lawsons Ridge - Hazelbrook

So after riding the fire trail near home, and managing a 7km ride along a nice flat gravel road on a weekend visit to my parents -  I decided it was time to tackle one of the popular or 'known' MTB trails in the Blue Mountains.

Using the wonderful Trailflix resource,  I decided upon giving the nearest track to home a go - Lawsons Ridge. Obviouly I wasn't going to make the full 20km return trip, my fitness and confidence are not up to that yet, expecially plugging along by myself.

I can tell you now - I made a few key mistakes on my first adventure and did not make it very far along Lawson's ridge at all! I did manage a couple of photos below - but no maps or video's. I expect to make another post in the future when I do this trail properly, and I will permanently link that as my 'guide and review' of the trail. Today's post is simply a couple of 'lessons learned'

  1. Do not head out on a ride at 1pm on a stinking hot day. I am not fit yet, and tire easily enough in the best of conditions. Rides should be planned for early morning or in the evening when you are starting out.
  2. Attempting a ride that is well beyond your fitness level is not fun and can be quite demoralising. Take time to look at a topographical map and read reviews of a trail before heading out with hopes of conquering it.
  3. If your fitness is not great - do not pick a trail that is mostly downhill on the way and uphill on the return... I am not sure the entire trail is like this, but the first couple of km I managed was. You do not want to have an uphill journey home if you are already tired.
  4. Snakes! I should carry at least a basic first aid kit and a bandage with me. Even on my short ride I saw 3 rather large black snakes. I did not have any mobile phone service (Although this is not uncommon for Vodafone even in the middle of Sydney..) so if I was bitten it would have been a little difficult.
So overall a little dissappointing, but I did enjoy getting out. I had to walk the bike up most of the hills on the return journey because I simply tired out far too quickly climbing hills in the heat. I would have been lucky if I covered 5km  total in this ride. I definitely need to find a more appropriate location to build my skills and fitness.


Wednesday, November 9, 2011

Hall Parade fire trail - Hazelbrook

True to my word - I returned to the little fire trail at the end of the block and rode it to the end. As you can see below in the sign, this is 'Hall Parade' fire trail, and is only 1.1km. While not long - it was up and down, and did test my fitness. I had a ball!

It took me about 30 minutes to ride to the end and back. I had to take breathers and walk the bike up a few steeper parts, but overall it was great fun. I am definitely getting fitter and my ability to ride up the hills is improving with every ride.


I want to start documenting the routes I take now - so I have made an attempt to map this out on a google map below. I doubt this little ride is significant enough for anyone to want to follow, but there were a few side trails I will explore in the future to see if a decent ride can be had from here.

My intention is to provide a google map link with the full detail of every ride I take as I start to get fitter and go further. I hope to also include photos and possibly even videos here for each ride so readers can get a good feel for a location before deciding to try it for themselves.

Just looking at the google maps satellite view - the vast abundance of fire trails in the Blue Mountains national park is clear. I am itching to explore them all - but of course careful planning is important so I don't get lost or get in over my head on a trail too advanced for me.

In my search for some resources to help me find local trails I came across an excellent resource in the Trailflix website. This is an awesome site - with a wealth of detail about all the popular MTB tracks in the Blue Mountains. I will definitely using this site as my guide in planning future rides.

Another awesome little smartphone app I have found is My Tracks. This great little app will let me record my rides and save them as a public google map, so I can share them here. It will also let me record statistics for my ride so I can measure my speed, elevation gain etc. - and track these. I imagine if I repeat tracks over time I will be see my speeds improve as my fitness improves.


View Hazelbrook fire trail in a larger map

First venture off-road!

After riding around on the road for a couple of weeks - I feel pretty comfortable with my bike set-up and the gear changes are starting to come a little more naturally for me. I felt today was a good time to venture off-road onto a local fire trail.

Our suburb borders with the Blue Mountains National Park - and I noticed during my street rides a fire trail which continues on from one of the dead end streets. The sign indicates it is a 1.5km trail - so nice and short for a first ride, although my intention was to just ride as far as I felt comfortable with and test the bike and my skills on a fire trail.

The first 500m of the track were all downhill, and there were some 'drainage humps/contours' about every 50m (I am almost 100% sure there is more appropriate MTB lingo for these drains, which I am sure I will learn in the near future). My many years of experience dirt biking in rugged mountain terrain immediately came back to me, and I easily flew along this trail with confidence and I even attempted a couple of little jumps over the drains (never got the back wheel off the ground though). It was very clear to me that this was going to be a sport I would love, and getting off the roads was where the real thrill was to be found.

Of course - given it was the evening and not long until dark, and my fitness, while improving, was still not great - I decided not to venture too far downhill to leave myself an uphill slog home. I was relatively surprised that I was able to ride back up the track without stopping. Improving my use of the gears, staying in the saddle and having the seat position correct have made uphill riding much easier, and I feel as if my fitness is on the improve.

Once back at the start of the track - I felt as if I could do it again... so I did! It was great - and really motivates me to get fitter and lose weight so I can go further and faster. I know I only rode about 2km off road, which is a tiny distance. But it is a start! And I was very happy with it. I will be returning to this little trail which is right at my front door and riding it to the end in the next few days for sure!

Progress - learning about my MTB and what I need to use it

The first thing you may notice in the title of this post is I have used the abbreviation 'MTB'. Picking up some of the lingo - impressed? I will be sounding pro in no time. You will notice the dates of these posts will not reflect the true passage of time for the first month or so - as I am adding content to Blogger from a month or longer ago to get up to date, so apologies if that is a little confusing while I play catchup.

So having ridden around the sealed streets for the last two weeks, and having chatted with a few friends at work I have learned a few valuable lessons:

  1. Just jumping on the bike and riding in my shorts and T-shirt is not going to cut it, my behind is killing me after 5 minutes. I have very quickly ordered an affordable pair of 'Knicks' online - and they have made the whole riding experience a lot more comfortable
  2. I lack the fitness, leg endurance and technique for climbing steep hills. As I have ventured further I have found myself walking the bike up a few hills. I have learned however that getting out of the saddle and pumping the pedals is not efficient on a MTB. I am getting better at staying in the seat and using the gears
  3. A quick look at Giant's website and the spec details of my bike has made me a lot more knowledgeable regarding the components of my bike, and the correct name for them. I also found this page to be a great snapshot for a learner, so you should not see me referring to the 'rear cog' any more - as I have now learned fancy terms such as 'cassette' and 'rear derailleur'.
  4. I constantly seem to have been setting my seat too low, resulting in sore knees. I was setting the seat at a height so I could relatively easily have both of my feet touching the ground at a stand still - which I would think is pretty common for a beginner to do... you don't want to fall over when you come to a stop or run out of puff up a steep hill. I am now using the angle of my knee/leg on the pedal at the bottom of it's stroke (aiming for knee bent at about 25 to 30 degrees) and this seems to result in a much more comfortable ride.
  5. Magpie's - they are very annoying for a learning rider - but also quite amusing. just another distraction for me as I try to master my riding technique, and helps me remember to wear my helmet.

Tuesday, November 8, 2011

Shiny new bike - first ride

So I got the new bike home and decided to take it for its first ride. I did a lot of dirt bike riding growing up in the country - but haven't ridden anything pedal powered for a good 15 years or more. But you know what they say about riding a bike... I am currently 99kg (a good 15kg overweight for my height) so this is going to be a bit of a learning journey as well as a physical challenge for me to say the least.

I have never owned or ridden anything pedal powered with gears - I have no idea where to set the seat hight or anything like that. I was supposed to get a bit of an intro at the bike shop but my wife ended up collecting the bike as I was busy with work - so I am just going to have to give it a shot and learn by trial and error.

So after inspecting the gear levers and the gear cogs and having a play - I figured out what does what. It seems on my right hand the 'trigger' shifts up a gear at the back wheel, and the 'thumb lever' shifts down (8 gears on the back cog). It seems the left hand controls shifting the front cog (3 gears), but the trigger shifts to a lower gear in this case and the thumb lever shifts up (opposite of the back cog). Simple mathematics tells me I have a total of 24 speeds at my disposal.

As you can tell - I do not know the correct terms for the parts of the bike, but I figure writing from this perspective may help other new riders. After studying all these parts and levers and cogs - I am already planning on some further research to understand all the parts of my bike and their function, so expect this in a future post.

So after memorising the gear levers I embark on a quick ride around the block. Nothing too adventurous is planned, just a maiden voyage to get a feel for the bike and make sure everything seems to be functioning on it. After about a 1km ride on relatively flat sealed surface, all in all it seems to be going pretty well. I changed the gears the wrong way a couple of times - but it was enjoyable. My balance and handling of the bike is fine, but it is evident that my fitness is pretty poor. Even after 1km I am feeling pretty saddle sore too!

I am very impressed with the bike - it is smooth to ride and feels very well constructed. Not really sure where this sport will take me at this stage - but I am hoping to get into some pretty rugged stuff and i feel that this bike will handle it well.