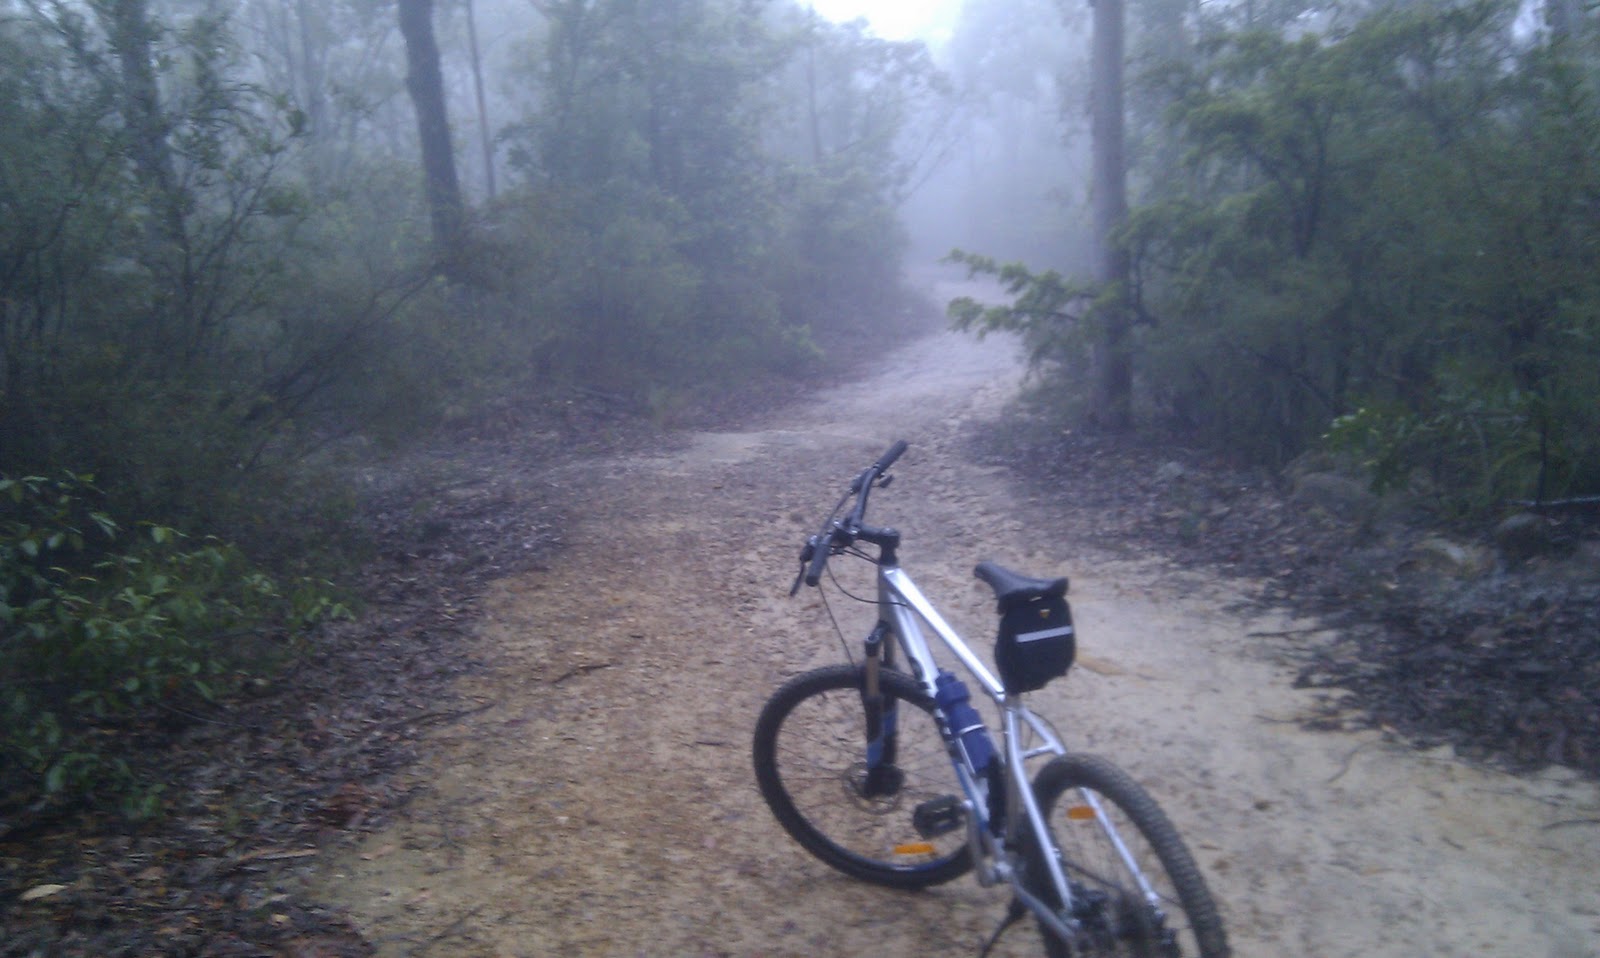
After a solid week of relentless rain, I was finally able to get out for a ride again the last couple of days. I completed Linden Ridge for the first time yesterday, and rode Winmalee this morning. My fitness is undoubtedly improving - and I have lost 6kg in the last month! I am extremely happy with my progress and fitness and healthy lifestyle improvements, and it motivates me to go further and faster!
This morning was the first time I have been able to finish the Winmalee loop non stop, including the steep pinch along Shaw's Ridge and the hill out at the end. To achieve this after backing up a 17.6km ride yesterday, and on a very wet track was a great achievement for me. I know this is a pretty easy track, but ease is a relative term.
For the first half of the track I actually felt my speed was limited more by the terrain and my skill and technique, rather than by my fitness. This is a great place to be getting to , as it allows me to focus more on my technique, and just enjoy the ride and environment.
One thing that the last couple of days has shown me is that riding on these wet sandy tracks is very hard on the bike, and harder on the rider too. On parts of Winmalee this morning I was pedalling with my feet under water, not to mention covering myself in sand and mud. By the end of Linden Ridge yesterday, the bike sounded like I was riding a pepper grinder.
If you are going to ride in the wet on the sandy tracks in the Blue Mountains - I believe it is essential to clean your bike after every ride. The wet sand that gathers in the disc brakes, around the cassette, rear derailleur and the idler pulley make the bike sound awful and harder to ride. I am sure riding with all that sand gunking everything up will cause components to wear much faster and run rougher.
So I called the friendly gents at BikeMinded, who are always very helpful with advice and did some google searching to work out what was the best and safest way to clean my bike without damaging anything.
Cleaning Technique:
All you will need is a basic plastic bristle brush, a bucket and some kitchen detergent.
Detergent with lemon seems to work well to cut through the gunk. Fill the bucket with warm water and detergent.
DO NOT use petrol, Degreaser, WD40 or any other type of solvent you may usually use for other mechanical cleaning purposes. This is not good for the chain, gears and bearings.
I find it easier to take the front wheel and seat off the bike before cleaning. If your seat is quick release you may want to remove the clamp as well to clean it - as this tends to get quite gunked up.
I also find it easiest to sit the bike upside down on a flat surface, so you can pedal the rear wheel with your hand.
Wet the bike down first. DO NOT use a high pressure hose to blast all of the sand and grit away. This could force water into bearings and other places you don't want it. A gentle mist or shower is best.
Once the bike is wet, scrub away all the grit with the brush and detergent. Don't be too rough, I find it best to scrub in one direction so you are flicking all the sand out.
You can pedal the rear wheel a bit as you clean the cassette and rear disc brake, but don't go overboard. Just enough to get around all of the cogs and idler pulley until everything is running smooth again.
Use the same process on the front wheel and seat.
Hose the bike off with a mist or gentle shower to remove all of the detergent.
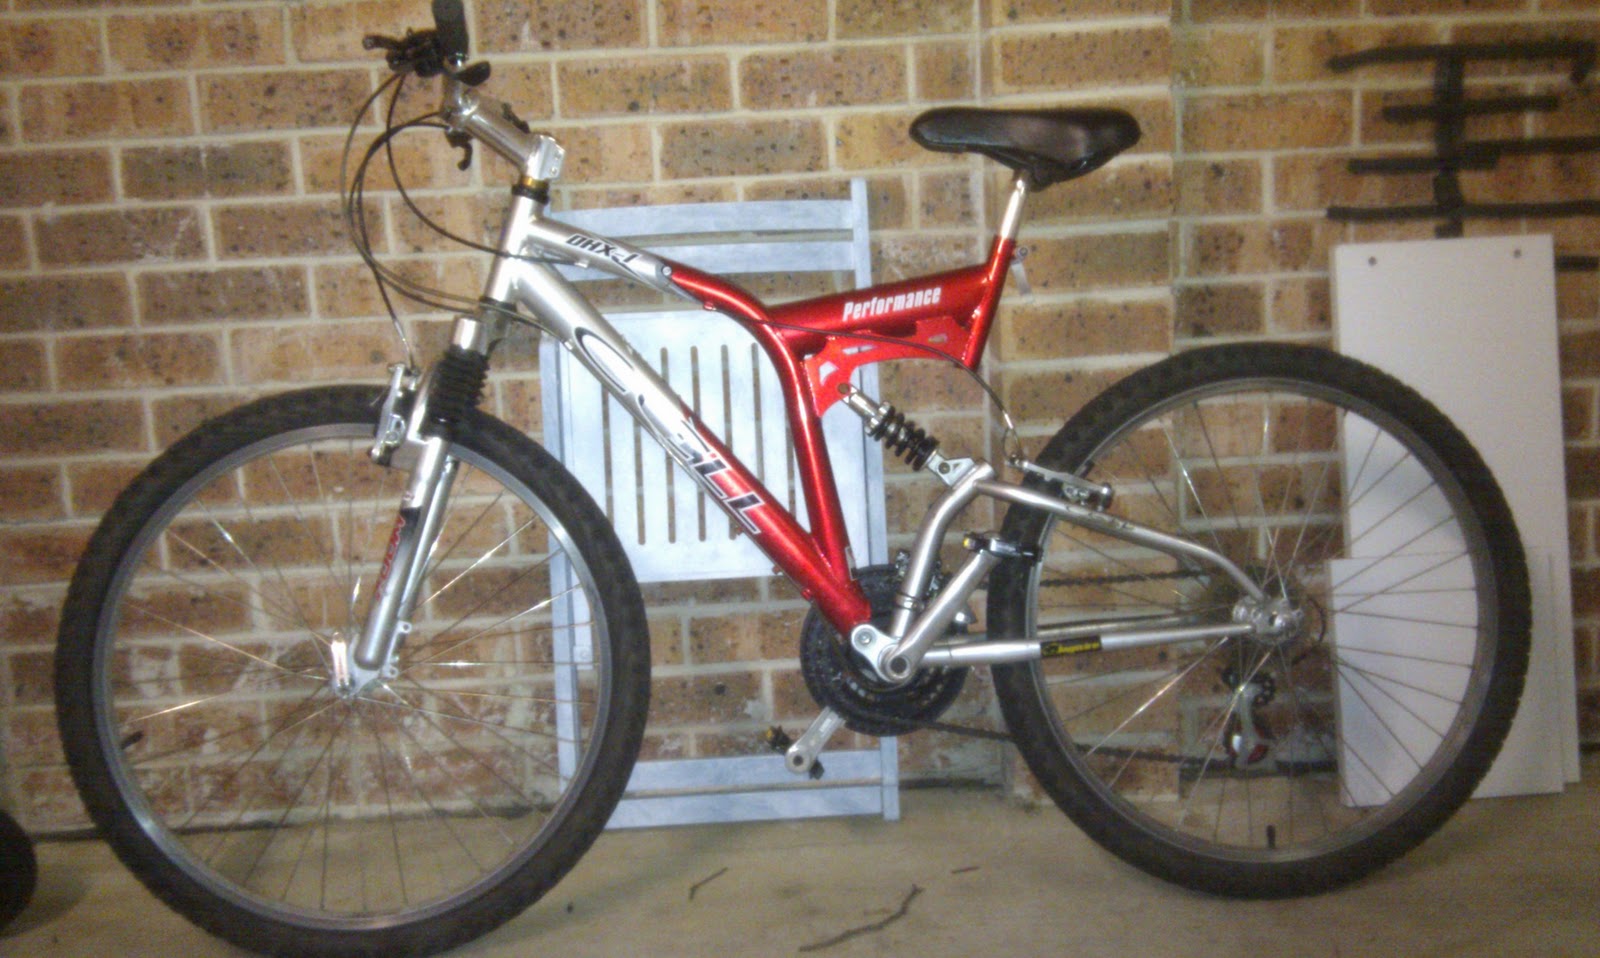
I purchased a second MTB off eBay the other day for $80, so that when my brothers in law visit in a month or so I can take them on a couple of rides. I looked into hiring bikes but at ~$40 a day I thought buying a second hand bike would be a better bet. I got a Cell dual suspension MTB in pretty reasonable condition given the price.
After a quick ride and a look over the bike - I noticed a few things might need attention before I took it off road for any serious distance. I am pretty mechanically minded, and service my own car and do minor repairs often. I have a decent set of tools, so I thought it was about time to learn a little more about MTB maintenance and repair. An $80 bike of eBay is the perfect place to learn, rather than risk stuffing up my nice new bike which is still under warranty.
So the list of repairs this bike will need to be deemed safe enough to put another family member on consists of:
Pedals (it has none!)
Rear wheel has play in it, probably need to tighten the bearings up.
Broken spoke in front wheel needs to be replaced.
V-brake brake pads are not aligned to the rims properly
Rear brake pads are stuffed, need replacing
Brakes don't seem to be releasing evenly on both sides, resulting in one pad continuing to rub the rim after release.
The wheels are not straight - I believe my multi tool has something called a 'spoke wrench' and I assume I can somehow use this to straighten the wheels up
So the first thing I need to do is acquire any parts I need. As I don't want to spend too much on this bike, I measured up the wheel to work out the spoke length I needed, and hit that trusty source of cheap parts we all know and love - eBay.
I acquired 10 spokes and nipples for $2.63 and a set of brake pads for $7.50. A friend from work was putting in an order with Cell Bikes so I added a $7 pair of basic pedals to his order, and once everything arrived I was all set.
Now it is time to hit Google and work out what I am doing, and exactly how to fix each of these relatively common and simple problems. Below is a brief summary of what I learned and how I fixed each problem:
Attaching Pedals: Very simple, all you need is the correct size open end spanner or even a shifting wrench will do. The only trick is to know that both pedals are not the same, and will be marked left and right - so make sure you put the correct one on each side. The non drive side pedal (left) is reverse threaded. You may also want to smear a little grease on the thread to make it easier to remove the pedals if you want to upgrade in the future.
Adjusting Bearings: By 'play in the wheel' I mean that the wheel will have movement from side to side on the axle. The cause of this is either ruined bearings, or simply that bearings need adjusting because they are not tight enough. Riding a bike without properly adjusted bearings will cause earlier wear and the bike will be less stable.
The first step here was to confirm the type of bearings mostly used in a MTB. As I suspected a relatively simple 'cup and cone' type hub system is used in the vast majority of bikes. Here is a good link that has some pictures.
So with a shifter and one open end spanner - I loosened the lock nut and tightened the cone until all play was gone from the wheel. You need to be careful here - you want the cone just tight enough to remove play, but not too tight to compress the bearing so that it doesn't rotate freely. Spin the wheel once you have it right, and if it doesn't spin freely, it is too tight. Back it off a bit until it spins freely, but if there is play on the axle again you have gone too far. With some trial and error I got it right.
Broken spoke and truing wheels: Replacing the broken spoke was simple. First remove the broken spoke - the section still attached to the wheel rim just slid out, and I unscrewed the part attached to the rim from the 'nipple'. The nipples are the little metal components the spokes screw into, and are inserted from inside the rim. If you need to replace the nipple as well, you would have to deflate the tyre and remove it at least partially.
I didn't need to replace the nipple, so I just threaded the new spoke through the hub and screwed the nipple onto it at the rim with my spoke wrench. Pay attention to how the other spokes are threaded and follow the same pattern. Tighten at the nipple until the spoke feels roughly as tight as the other's.
One trick to remember when tightening spokes is that you are turning the nipple, not the spoke, so you rotate in the opposite direction than you usually would to tighten something. Just remember that you are turning the nipple, and not the spoke and this is easy enough, even though it may feel counter intuitive.
Once the spoke looks right - I had to 'true the wheel'. Now truing wheels is a little more complicated to explain, but basically you want the spokes on each side of the wheel to all be even so that the wheel spin's perfectly straight. You will know your wheel is not true if you spin it with the brake pad compressed to be almost toughing the rim, and one section of the rim touches the pad as it passes. My bike was so out of true after replacing the spoke that you could not spin the wheel with the brakes connected up.
The below video will make this clearer, and using this as a guide, and a bit of time and patience, I was able to successfully get both wheels in a pretty good state :
Brake Issues: V brakes are quite simple in the way they function, and easy to adjust. The below diagram illustrates the key components:
To replace pads you just remove the pad assembly with the correct size allen key, and fit the new pads. Pay attention to how the spacers and the assembly need to be installed as you are removing the old one.
Once I installed the new pads, I had to align all 4 of the pads to the rims. It is common sense that the pads need to contact the flat surface of the rim evenly. Simply loosen the pad with the allen key, apply the brake and position correctly, and then tighten into position. I found the pads often moved a little as I was tightening, so I had to take care to tighten slowly and to hold the pads firmly in place with my other hand. Remember you need to get 3 things right:
The vertical position on the arm so that the pad is in centre of the flat edge of the wheel rim
Flat on the vertical plane, so that the top or bottom of the pad is not contacting the rim first.
Flat on the horizontal plane, although from what I read some people prefer to have the leading edge of the brake tough the rim slightly earlier, I would go with dead flat
The last thing I had to adjust was the brake arm centring. You want both pads to contact each side of the rim at the same time when you apply the brake, and release evenly when you release the brake. This is adjusted with the spring tension centring screws on each side (pictured above). Simply tighten the side you want to have more tension in the spring (or loosen the other). For example - if the left pad is contacting early, and not releasing from the rim - tighten this side.
That is about it - the bike is good to ride now - I am very happy with it for $80 plus about another $20 in parts, and I learned a lot fixing it up.
I would have to say Falconbridge Point is the easiest Blue Mountains ride for beginners. It is longer than Winmalee at a minimum of 13.5 km return (depending on where you park), but faster flowing and generally easier. While the views along the way and the terrain are not fantastic, the Falconbridge Point lookout at the end is the highlight and make this a great track to ride. If your fitness is still a work in progress like mine was the first time I rode this track don't worry, I got out and back in just on 1 hour riding time and took a good 20 minutes at the end to take a breather and admire the view.
Great view at Falconbridge Point
Getting there:
Follow the Great Western Highway to Falconbridge, and coming from Sydney turn right into Grose Road. Keep following Grose Rd for a few km, you will pass a sign that tells you Falconbridge Point is 8km from this point. You can park here and make a 16km return ride of it, or as long as gravel road and a few potholes don't scare you - continue pretty much all the way to the park gate at the trail head.
The return ride from the park gate is 13.5km. Please be careful if you drive all the way to the park gate as the road is a little narrow and riders and walkers use it too.
Review:
Starting from the gate, you will see this is a pretty fast flowing and well maintained fire trail. You just follow the trail straight to the lookout at Falconbridge Point, there is no way you can get lost so just enjoy the ride!
The trail is sandy and rocky in a few places so be a little careful, but it is generally smooth and fast flowing. Even with my limited experience and skills I managed to ride a few sections at a good 40km/h which was great fun. I have ridden this trail a few times now and ride out and back in under an hour quite comfortably. I would say that the track difficulty is about the same in both directions, possible slightly easier on the return.
There is nothing spectacular about the ride, no single track or significant variation in the scenery. It is the fast flowing ride and the spectacular view at the end that keep me coming back here, I really do enjoy the ride. About 1.5km from the end the track the scenery opens out a bit and you ride over some large flat rocks, and then there is a bit of rocky uphill that is more overgrown than the rest of the trail. I find this section interesting, and fun to fly down on the return.
Overall, a relatively easy ride with one of the best view's I have seen in the Blue Mountains at the end. I highly recommend this as your first track as a beginner, and if you are a more advanced rider I would suggest you have to do this ride at least once just to see the awesome view at Falconbridge Point.
Map:
This map shows the ride from the date out and back. If you look at the stats and the elevation chart you will see that the elevation only varies by about 30m across this trail, which is one factor that makes it a relatively easy ride and suited to beginners.
Now that I have have started riding a couple of decent tracks and am slowly getting fitter, I figured I might start setting up my bike a little to suit me. So I spoke to a few friends, and spent a little Google time to work out what accessories I do and don't need on the bike.
I won't cover what I actually plan to carry with me riding - just what I will attach to the bike or buy to have at home for maintenance. This is only a basic list for starting out so don't expect it to be exhaustive.
Don't:
Kickstand: a rattling, unreliable death-trap. The first scratch on my bike was due to the wind blowing it over while it was resting on the kickstand. This rattles around on rocky terrain, and I can imaging a big enough jolt would flip it down and throw you off the bike. Take it off!
Bell: was kind of in the way where I wanted to mount my smart phone holder (below) - and realistically I won't use it. I find riding on the road boring so I don't really care if my bike isn't street legal. If I want to ride to the shops I can put them back on in 5 mins.
For the same reasons as above - I removed all of the reflectors as well. The rear one was in the way when attaching the wedge pack (below) so I just got rid of them all. Same as the bell - easy to put back on if I need it.
Do:
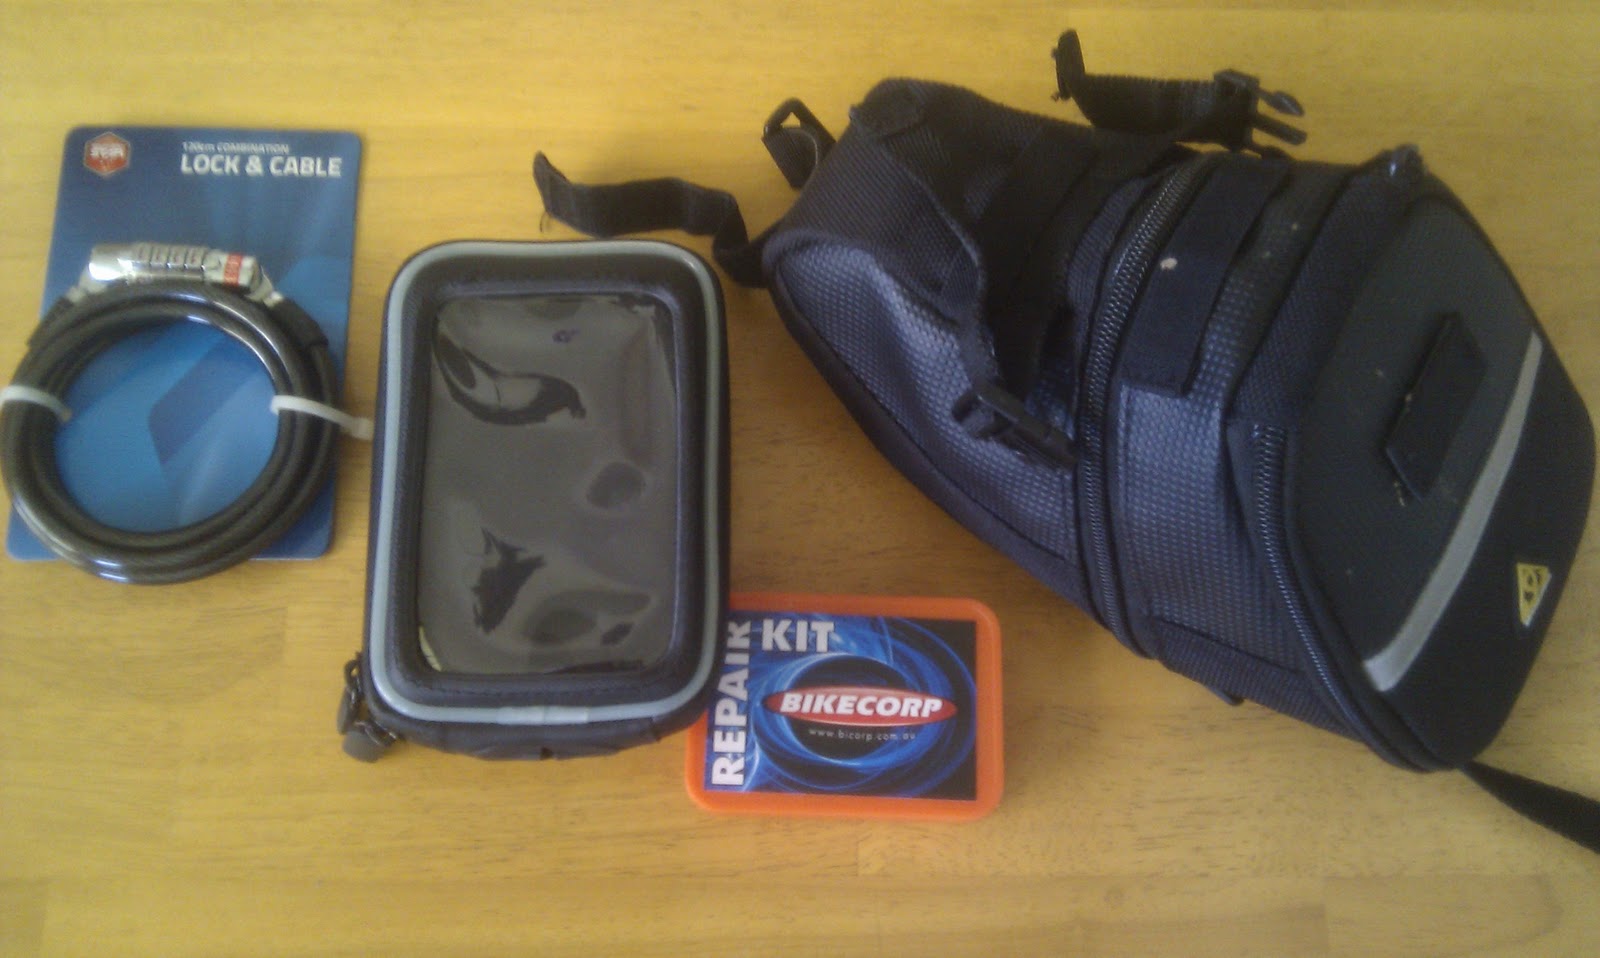
Lock and cable. Won't exactly stop master thieves - but at least I can leave the bike in the rack at work or not worry about someone running off with it if I need to be away from it for a minute for any reason when I am out and about.
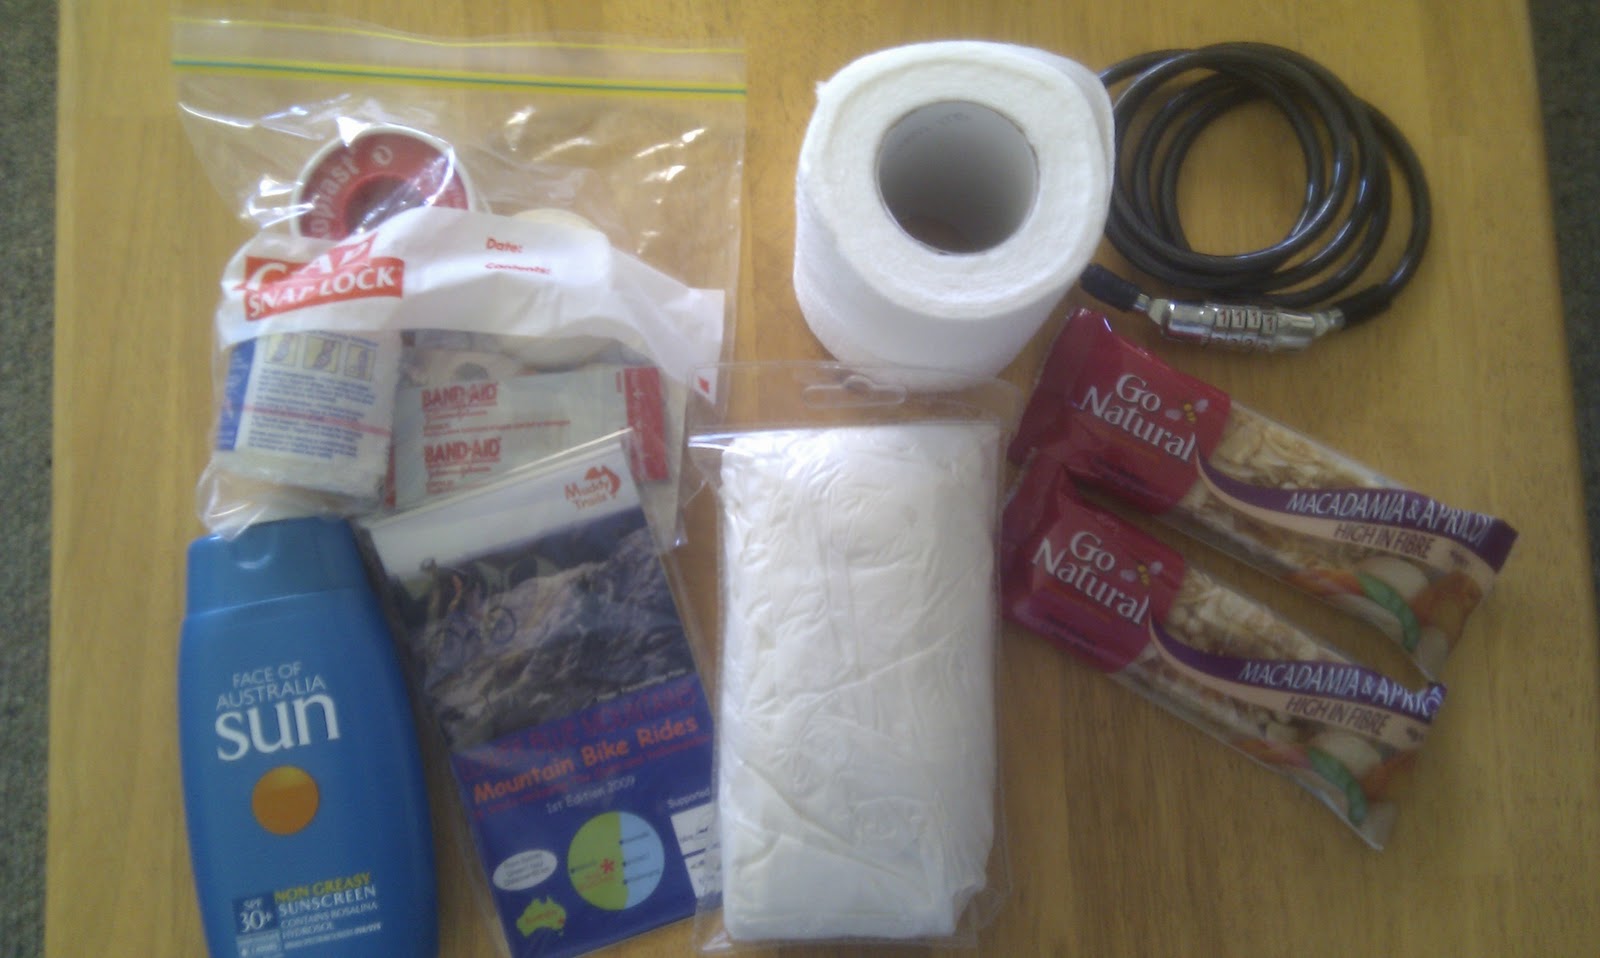
Wedge Pack. A very convenient way to carry essentials when riding. Mine contains a bike multi tool, puncture kit and mini pump, spare tube as well as a few other goodies which I will cover in a later post as I figure out what I will carry with me on longer rides. You will want a water proof wedge pack, especially if you do not have a rear mud guard. I also got one that expands to a larger size if desired.
Smartphone holder. This is pretty neat, it has a pivot mount you can attach to the handlebars, and it is waterproof. You can operate the touch screen through the front cover, and it is easy to remove if not needed. I Use my phone to record all my rides and stats like time and distance. I also intend to use the gps to navigate if needed, although all of the trails I have ridden so far are simple to follow.
That's about it for now - I am sure I will acquire and discard various accessories as I learn more about this wonderful sport in the future, and that is just part of the fun.
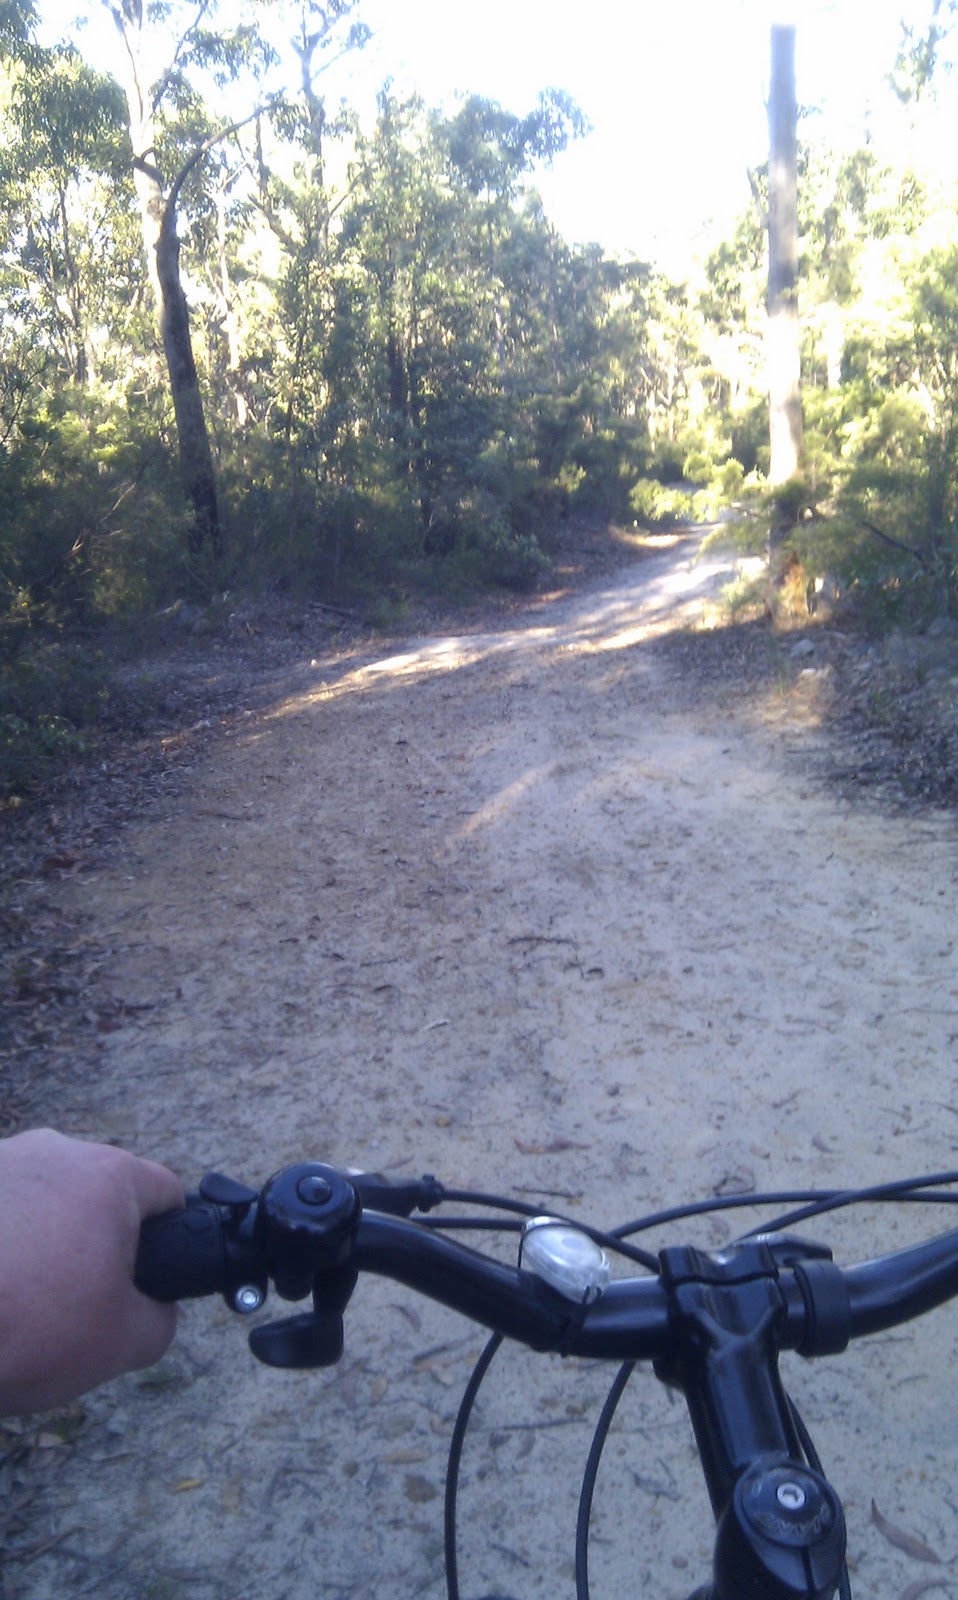
Winmalee was the first track in the Blue Mountains I was able to complete as a beginner mountain biker, and I loved it. The track is a loop so you don't have to ride any of it twice, and the vegetation you ride through is quite varied.
At a little over 9km the loop is not too long for those still working on their fitness and building up to longer rides. There were a couple of hills I had to push the bike up - but these are not significant. If you want a slightly longer but overall easier ride I would recommend Falconbridge Point as a first ride.
Getting there:
I recorded my ride using the great android app My Tracks, and the result is displayed below. Heading from Sydney, follow the M4/Great Western Highway west to Springwood, and then turn off onto Hawkesbury Road towards Winmalee. Follow this about 5km then turn off left into White Cross Road, which you follow to the end where the trail head and a small gravel car park are located.
Review:
When you arrive at the trailhead - there is a helpful information board just inside the gate. This is a very easy track to follow, if it is your first time here you will not have to worry about getting lost.
The trail stars with some downhill, and after about 100m you are able to continue straight/right along Shaw's Ridge, or turn left to Blue Gum Swamp. As this is a loop track, you can go either way. I would recommend heading towards Shaw's ridge - this is the most common direction, probably due to the quite steep downhill as you descend from Shaw's Ridge down to the Blue Gum Swamp Creek return leg.
Shaw's Ridge is mostly rolling hills - and is a pretty wide, well maintained fire trail. There is one short steep rocky incline that I have still not been able to ride through after 4 attempts now - but apart from that this is easy riding. After about 4km you will come to a pretty steep decline with a few very sharp turns, so take it easy down this section. You will see why most people prefer to ride the track in this direction as you are descending this hill.
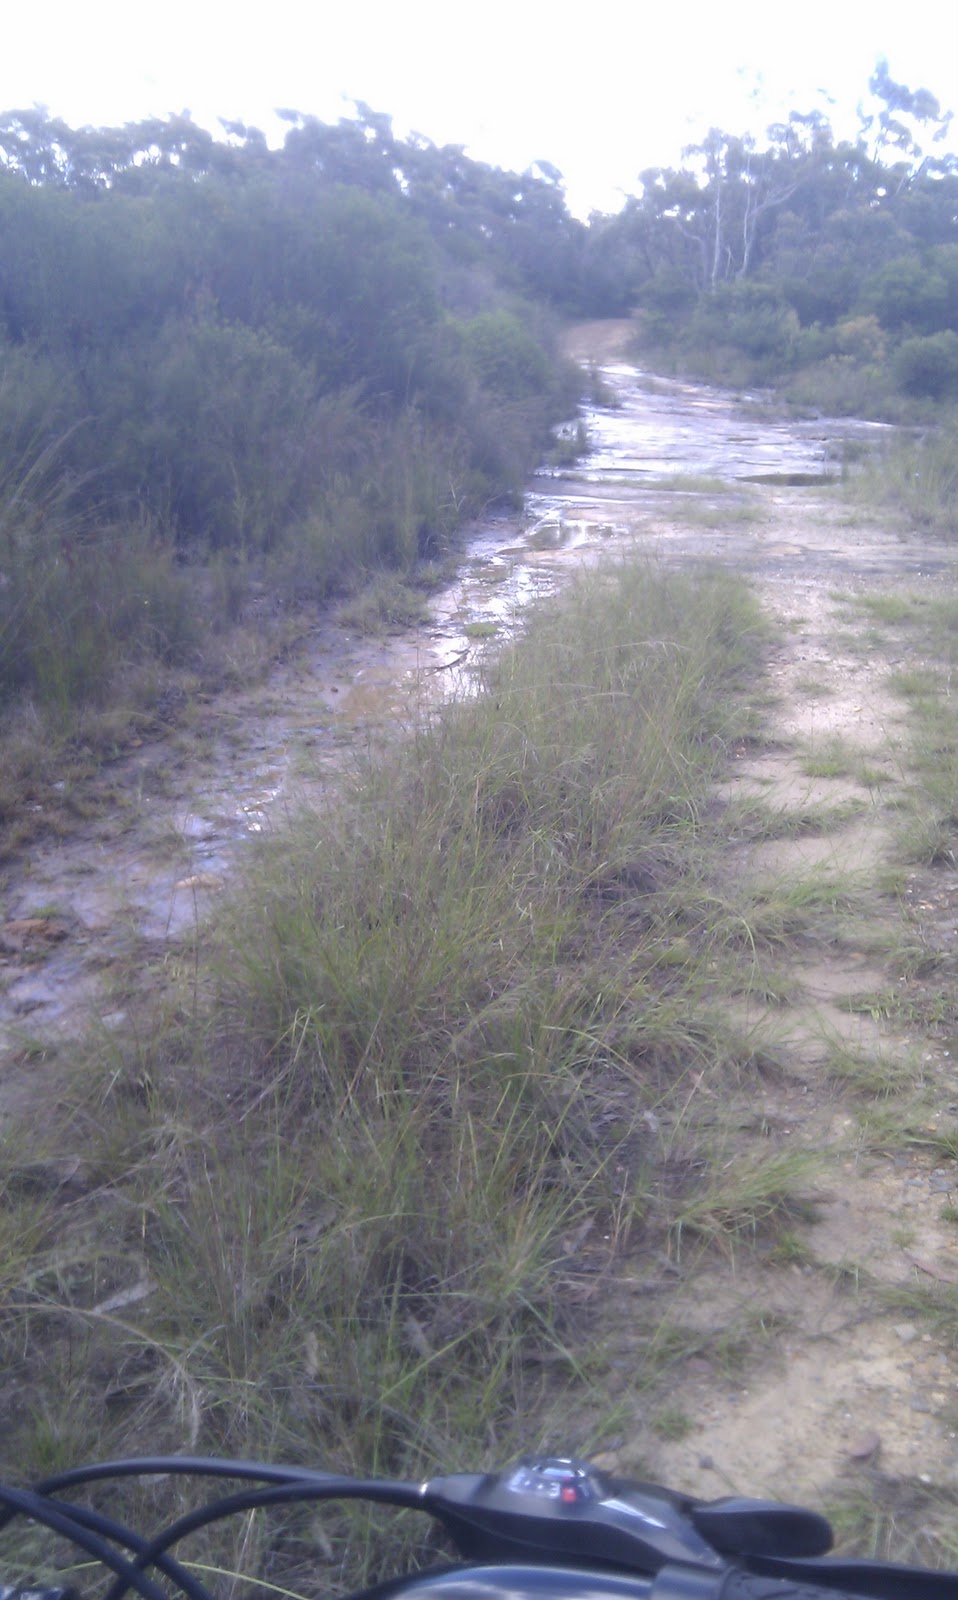
Once you reach the bottom you will follow the track across to Blue Gum Swamp Creek - and commence the return leg of the loop. This is my favourite part of the ride, the vegetation changes and even though it is still fire trail, the track is overgrown with ferns enough that it feels like single track. There are a couple of rocky creek crossing so take it easy, and have some fun riding through the water if it has rained recently. remember that there may be riders flying along here doing the loop in the other direction and walkers use this track as well.
There is an optional extension to the track at the start of Blue Gum Swamp Creek - you will see a sign pointing back to Shaw's Ridge (where you just came from), continuing along to Blue Gum Swamp, or you can take the alternate trail marked 'Bees Nest Hill' and 'Grose Head South'. I have not ridden the Bees Nest Hill leg, but understand it is very steep and involves pushing the bike up a 1km hill for most riders. Once you reach the hill it is only a short ride to a great lookout, and you can trek to Grose Head south (about an hour return) if you are particularly keen.
After the nice easy ride along Blue Gum Swamp Creek, you have a bit of climb back up to the intersection where you first went straight along Shaw's ridge. If you are not fit this may be a bit of a challenge, I still have to stop and take a breather and push the bike up one or two small sections here, but it is nice wide fire trail and not a long pull.
Overall I find this to be a great track and manageable for those just starting out. In hindsight I think Falconbridge Point would have been a slightly easier track for my first ride, even though it is a little longer. The variation of the track and vegetation make Winmalee a really enjoyable ride overall, and as it only takes about 40 minutes I will definitely be fitting this loop in as an early morning ride on the way to work in the future.
Map:
This map shows the basic loop from the trailhead, along Shaw's Ridge and returning via Blue Gum Swamp.
A short snippet of video along the return Blue Gum Swamp leg of the loop. Apologies it is a little shaky, I was using the high tech method of holding my phone in my hand to record it.
After my lame efforts at Lawson'd Ridge - I decided that I needed a nice flat easy location to crank out some km on the bike. I enjoyed my ride along the nice flat gravel road a couple of weeks ago simply because I could cover more distance than other locations. Granted - it was not the rugged mountain trails I really want to be riding, but all things in their time.
I need somewhere I can cycle constantly for a good hour without tiring. I hope this will help me build fitness, endurance in my legs and more than anything - self confidence that I can tackle a ride of more than a few km.
So with a little more research I decided that I would aim to complete Winmalee as my first 'recognised MTB trail' - but before that I would throw the bike in my car on work days and take advantage of all the nice flat cycleways around Sydney Olympic Park (which happens to be where I work).
This was a great move. I have ridden every few days at Olympic Park over the last couple of weeks, covering almost 20km some days. While this may not sound like much - it is a big step up for me, and the confidence boost I needed. I can definitely feel my fitness and muscle endurance improving.
There is dedicated cycleway all through Olympic Park, and you can ride through the wetlands, or along Paramatta river (below), or even around Bicentenial Park. This would be a great place to take your family for a ride - I highly recommend it for befinners or just a relaxing day out.
I even dropped by Winmalee one afternoon and rode about 3km out along Shaws Ridge and back. I didn't want to ride the full loop for the first time in the fading afternoon light, but I had great fun and now feel I am ready to tackle the Winmalee trail in the next few days.
I think it is a good idea to ride new trails for the first time in the morning rather than the afternoon - just in case it takes longer than expected or I get lost. Although from what I read the Winmalee loop is very easy to follow.
So after riding the fire trail near home, and managing a 7km ride
along a nice flat gravel road on a weekend visit to my parents - I
decided it was time to tackle one of the popular or 'known' MTB trails
in the Blue Mountains.
Using the wonderful Trailflix resource, I decided upon giving the nearest track to home a go - Lawsons Ridge. Obviouly I wasn't going to make the full 20km return trip, my fitness and confidence are not up to that yet, expecially plugging along by myself.
I can tell you now - I made a few key mistakes on my first adventure and did not make it very far along Lawson's ridge at all! I did manage a couple of photos below - but no maps or video's. I expect to make another post in the future when I do this trail properly, and I will permanently link that as my 'guide and review' of the trail. Today's post is simply a couple of 'lessons learned'
Do not head out on a ride at 1pm on a stinking hot day. I am not fit yet, and tire easily enough in the best of conditions. Rides should be planned for early morning or in the evening when you are starting out.
Attempting a ride that is well beyond your fitness level is not fun and can be quite demoralising. Take time to look at a topographical map and read reviews of a trail before heading out with hopes of conquering it.
If your fitness is not great - do not pick a trail that is mostly downhill on the way and uphill on the return... I am not sure the entire trail is like this, but the first couple of km I managed was. You do not want to have an uphill journey home if you are already tired.
Snakes! I should carry at least a basic first aid kit and a bandage with me. Even on my short ride I saw 3 rather large black snakes. I did not have any mobile phone service (Although this is not uncommon for Vodafone even in the middle of Sydney..) so if I was bitten it would have been a little difficult.
So overall a little dissappointing, but I did enjoy getting out. I had to walk the bike up most of the hills on the return journey because I simply tired out far too quickly climbing hills in the heat. I would have been lucky if I covered 5km total in this ride. I definitely need to find a more appropriate location to build my skills and fitness.
True to my word - I returned to the little fire trail at the end of the block and rode it to the end. As you can see below in the sign, this is 'Hall Parade' fire trail, and is only 1.1km. While not long - it was up and down, and did test my fitness. I had a ball!
It took me about 30 minutes to ride to the end and back. I had to take breathers and walk the bike up a few steeper parts, but overall it was great fun. I am definitely getting fitter and my ability to ride up the hills is improving with every ride.
I want to start documenting the routes I take now - so I have made an attempt to map this out on a google map below. I doubt this little ride is significant enough for anyone to want to follow, but there were a few side trails I will explore in the future to see if a decent ride can be had from here.
My intention is to provide a google map link with the full detail of every ride I take as I start to get fitter and go further. I hope to also include photos and possibly even videos here for each ride so readers can get a good feel for a location before deciding to try it for themselves.
Just looking at the google maps satellite view - the vast abundance of fire trails in the Blue Mountains national park is clear. I am itching to explore them all - but of course careful planning is important so I don't get lost or get in over my head on a trail too advanced for me.
In my search for some resources to help me find local trails I came across an excellent resource in the Trailflix website. This is an awesome site - with a wealth of detail about all the popular MTB tracks in the Blue Mountains. I will definitely using this site as my guide in planning future rides.
Another awesome little smartphone app I have found is My Tracks. This great little app will let me record my rides and save them as a public google map, so I can share them here. It will also let me record statistics for my ride so I can measure my speed, elevation gain etc. - and track these. I imagine if I repeat tracks over time I will be see my speeds improve as my fitness improves.
After riding around on the road for a couple of weeks - I feel pretty comfortable with my bike set-up and the gear changes are starting to come a little more naturally for me. I felt today was a good time to venture off-road onto a local fire trail.
Our suburb borders with the Blue Mountains National Park - and I noticed during my street rides a fire trail which continues on from one of the dead end streets. The sign indicates it is a 1.5km trail - so nice and short for a first ride, although my intention was to just ride as far as I felt comfortable with and test the bike and my skills on a fire trail.
The first 500m of the track were all downhill, and there were some 'drainage humps/contours' about every 50m (I am almost 100% sure there is more appropriate MTB lingo for these drains, which I am sure I will learn in the near future). My many years of experience dirt biking in rugged mountain terrain immediately came back to me, and I easily flew along this trail with confidence and I even attempted a couple of little jumps over the drains (never got the back wheel off the ground though). It was very clear to me that this was going to be a sport I would love, and getting off the roads was where the real thrill was to be found.
Of course - given it was the evening and not long until dark, and my fitness, while improving, was still not great - I decided not to venture too far downhill to leave myself an uphill slog home. I was relatively surprised that I was able to ride back up the track without stopping. Improving my use of the gears, staying in the saddle and having the seat position correct have made uphill riding much easier, and I feel as if my fitness is on the improve.
Once back at the start of the track - I felt as if I could do it again... so I did! It was great - and really motivates me to get fitter and lose weight so I can go further and faster. I know I only rode about 2km off road, which is a tiny distance. But it is a start! And I was very happy with it. I will be returning to this little trail which is right at my front door and riding it to the end in the next few days for sure!
The first thing you may notice in the title of this post is I have used the abbreviation 'MTB'. Picking up some of the lingo - impressed? I will be sounding pro in no time. You will notice the dates of these posts will not reflect the true passage of time for the first month or so - as I am adding content to Blogger from a month or longer ago to get up to date, so apologies if that is a little confusing while I play catchup.
So having ridden around the sealed streets for the last two weeks, and having chatted with a few friends at work I have learned a few valuable lessons:
Just jumping on the bike and riding in my shorts and T-shirt is not going to cut it, my behind is killing me after 5 minutes. I have very quickly ordered an affordable pair of 'Knicks' online - and they have made the whole riding experience a lot more comfortable
I lack the fitness, leg endurance and technique for climbing steep hills. As I have ventured further I have found myself walking the bike up a few hills. I have learned however that getting out of the saddle and pumping the pedals is not efficient on a MTB. I am getting better at staying in the seat and using the gears
A quick look at Giant's website and the spec details of my bike has made me a lot more knowledgeable regarding the components of my bike, and the correct name for them. I also found this page to be a great snapshot for a learner, so you should not see me referring to the 'rear cog' any more - as I have now learned fancy terms such as 'cassette' and 'rear derailleur'.
I constantly seem to have been setting my seat too low, resulting in sore knees. I was setting the seat at a height so I could relatively easily have both of my feet touching the ground at a stand still - which I would think is pretty common for a beginner to do... you don't want to fall over when you come to a stop or run out of puff up a steep hill. I am now using the angle of my knee/leg on the pedal at the bottom of it's stroke (aiming for knee bent at about 25 to 30 degrees) and this seems to result in a much more comfortable ride.
Magpie's - they are very annoying for a learning rider - but also quite amusing. just another distraction for me as I try to master my riding technique, and helps me remember to wear my helmet.
So I got the new bike home and decided to take it for its first ride. I did a lot of dirt bike riding growing up in the country - but haven't ridden anything pedal powered for a good 15 years or more. But you know what they say about riding a bike... I am currently 99kg (a good 15kg overweight for my height) so this is going to be a bit of a learning journey as well as a physical challenge for me to say the least.
I have never owned or ridden anything pedal powered with gears - I have no idea where to set the seat hight or anything like that. I was supposed to get a bit of an intro at the bike shop but my wife ended up collecting the bike as I was busy with work - so I am just going to have to give it a shot and learn by trial and error.
So after inspecting the gear levers and the gear cogs and having a play - I figured out what does what. It seems on my right hand the 'trigger' shifts up a gear at the back wheel, and the 'thumb lever' shifts down (8 gears on the back cog). It seems the left hand controls shifting the front cog (3 gears), but the trigger shifts to a lower gear in this case and the thumb lever shifts up (opposite of the back cog). Simple mathematics tells me I have a total of 24 speeds at my disposal.
As you can tell - I do not know the correct terms for the parts of the bike, but I figure writing from this perspective may help other new riders. After studying all these parts and levers and cogs - I am already planning on some further research to understand all the parts of my bike and their function, so expect this in a future post.
So after memorising the gear levers I embark on a quick ride around the block. Nothing too adventurous is planned, just a maiden voyage to get a feel for the bike and make sure everything seems to be functioning on it. After about a 1km ride on relatively flat sealed surface, all in all it seems to be going pretty well. I changed the gears the wrong way a couple of times - but it was enjoyable. My balance and handling of the bike is fine, but it is evident that my fitness is pretty poor. Even after 1km I am feeling pretty saddle sore too!
I am very impressed with the bike - it is smooth to ride and feels very well constructed. Not really sure where this sport will take me at this stage - but I am hoping to get into some pretty rugged stuff and i feel that this bike will handle it well.
Greetings, and welcome to Blue Mountain Biking. I guess I should kick this off by introducing myself - my name is James - and my wife and I recently moved to Hazelbrook, in the blue mountains. Having grown up in the country on our family property, I was very much attracted to the beauty of this area, while still having proximity to Sydney for work. After living here for six months now we feel we have finally found somewhere we would like to settle down.
About 3 months after moving here my wife kindly gave me a shiny new mountain bike for my 31st birthday - a Giant Boulder 1. From the seat of my mountain bike I have been progressively getting more and more addicted to this wonderful sport and the multitude of great tracks I am progressively exploring around the blue mountains.
So I thought it would be good to document my journey here from two perspectives:
An absolute novice learning more and more about the wonderful world of mountain biking. Maybe some readers in a similar situation may be able to find information here that I struggled to find, or learn from my mistakes.
Someone new to the blue mountains area, constantly searching for new tracks to ride on. I am hoping to document my rides and tracks to help other riders of any level find tracks appropriate to their tastes and skill level. As I lose weight and get fitter I will try more and more advanced tracks in the blue mountains area, and I should be able to give readers fair indication of how difficult a track is and maybe some direction so you don't get lost.
So enjoy - I welcome any comments or feedback and I hope you find something useful or entertaining here.


